How to Make Homemade Baby Food in 5 Steps
So, your baby is now about 6 months old, and you think it’s time to introduce solid foods. Perhaps you’re excited. Perhaps you have a ton of questions. Perhaps you’re terrified. Or, perhaps you’re all of the above, like I was. All of this is completely normal. Whether you choose to make all of your baby’s food like I did or combine a select few staples with store-bought baby food, here’s a quick 5-step guide to help you through Stage One (up to 8 or 9 months).
* Important: always consult your pediatrician before introducing solid foods to your baby.

Step 1: Prep
Tools
Your most important tool will be a high-quality blender. You don’t need to buy a special baby food cooker, but you do need a good, reliable blender that will "smoothify" the food with ease. You’ll also need:
- a colander
- food storage containers
- food cube trays
- a steamer, and
- a wooden, rubber or plastic spatula.
Food Selection
In the past, pediatricians suggested starting with a single grain (e.g., rice cereal), but there’s no medical evidence that doing so promotes better growth and development than starting with other foods like fruits and vegetables, according to the American Academy of Pediatrics.
Per our pediatrician’s recommendation, I started with nutrient-dense orange foods (e.g., sweet potatoes, carrots and butternut squash), due to their mild, slightly sweet flavors and puree-friendly textures. Next, we tried green foods (e.g., peas and avocados), followed by fruit, grains and proteins.
Use fresh food and buy organic whenever possible. Ideally, you should plan to use what you buy within 1-2 days after purchasing. Wash foods thoroughly in cold running water; and chop, peel and/or pit, if necessary.
Introduce each food in isolation, waiting 3-4 days to watch for allergic reactions before you introduce another food. “Common allergic reactions include skin rashes, such as eczema, respiratory issues such as wheezing and congestion, vomiting and diarrhea and bloody diarrhea with some weight loss,” says pediatrician Dr. Thompson-Chittams. If any of these occur, stop the food immediately and contact your pediatrician.

Step 2: Cook
Start with small batches, and once you find that your baby likes a certain food (and that s/he’s not allergic to it), you can make larger batches to store for later.
Bake or steam the veggies to retain more nutrients. Cook them until they are soft and tender, but not mushy. Steam apples, pears and prunes before pureeing, but for other Stage One fruits like mangos, peaches, plums, etc., you can puree without steaming. For very soft fruits like bananas and avocados, just mash them with a fork and serve immediately to avoid browning.
Do not add spices, especially not salt or sugar, until the later stages.
Step 3: Puree
Depending on the consistency of the food, you may be able to puree it by itself after cooking (e.g., steamed apples). Sometimes, however, you’ll have to add liquid to thin it out (e.g., sweet potatoes). In that case, use the leftover cooking liquid instead of plain water to return a few nutrients to the puree.
Your goal is to get a smooth puree with no chunks. You can add breast milk or formula to give a nutritional boost and make the texture a bit creamier. If you do, be sure to add these only to individual servings on demand and not to the whole batch. In those instances, discard any leftovers once mealtime is over; do not reheat the individual servings later.
Step 4: Store
Once you puree, allow the food to cool and then put it in a few containers (ideally, within an hour) to keep in the refrigerator for a day or two. You can keep containers of freshly made food for up to 72 hours, although 48 is preferred.
Pour the rest of the cooled batch in food cube trays and freeze overnight. Once frozen, pop the cubes out and put them into freezer bags. Putting the cubes in the bags frees up space in your freezer and allows you to re-use the trays when it’s time to make your next batch. Each cube is 1 ounce, which is great to know when you’re making portions. Do not refreeze purees after defrosting.
Step 5: Serve
Before serving your baby, stir the puree around the bowl to distribute the heat evenly. The food should be no warmer than body temperature. Start with a serving size of 1-2 tablespoons and gradually move to 3-4 tablespoons as your baby’s appetite grows.
In my experience, it was always safe to start with 2-ounce food containers as a gauge. If my daughter wanted less, that was fine, and if she wanted more, I just added to it. If your baby doesn't finish a serving, be sure to discard the leftovers, since the baby’s saliva can it make easy for bacteria to grow in the food.
Don’t forget that your baby should still be drinking milk even after you introduce solids. “On average, babies who are 4-6 months old should consume 24-32 ounces of breast milk or formula a day.” says Dr. Thompson-Chittams.
For more detailed information, click here for access to my FREE eBook, “How to Make the Best Food for Your Baby."

*This article also appears as a guest post on AvivaGoldfarb.com.
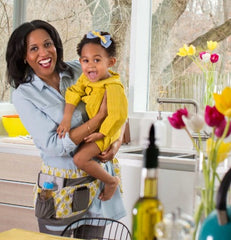 Hey Haute Mamas! I'm Riche Holmes Grant, a modern mom + mompreneur who designs smart + stylish products that make your mommy gig easier.
When I'm not busy taking orders from my #miniboss, I'm contributing to MarthaStewart.com or in the kitchen whipping up delicious family-friendly creations in my BambiniWare Apronini.
Get my FREE book on How to Make the Best Food for Your Baby here!
I live in the Washington, DC area with my husband and daughter. Follow our adventures on Instagram via @BambiniWareLife!
- Categories: Food + Drink
- Riche Holmes Grant



Comments 0