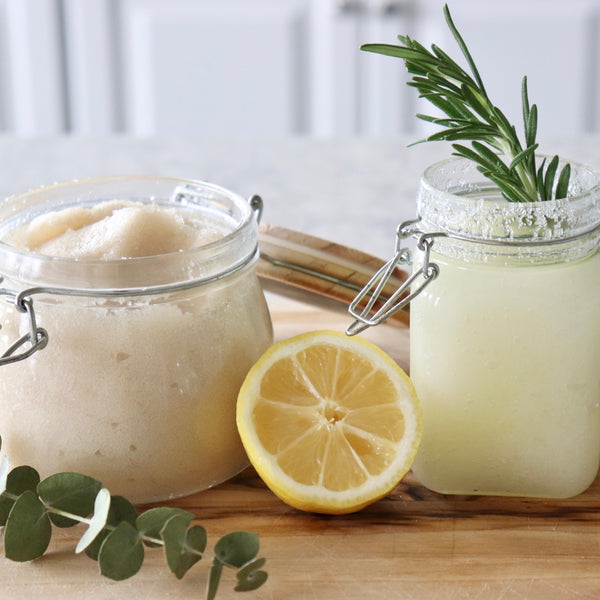
A DIY Easter Goody That is the (Bath) Bomb

Materials
- 1 cup baking soda
- 1/2 cup cream of tartar or citric acid*
- 1/2 cup Epsom salt
- 1 tablespoon carrier oil of your choice (olive, almond, coconut), plus extra for greasing Easter egg molds
- 1 tablespoon water
- 20 drops essential oil of your choice (lavender, peppermint, eucalyptus)
- Food coloring (optional)
- Dried flowers (optional)
*Citric acid is available in the supplements section at Whole Foods Market, at smaller health food shops and on-line. If you can't find it, however, you can substitute it with the same amount of cream of tartar, available in the baking aisle of the grocery store.

Equipment
- Large metal or glass bowl
- Small glass bowl
- Whisk
- Large Easter egg molds (each batch makes up to 4 large bath bombs)
- Empty egg carton

Steps
1. Lightly grease the inside of both halves of the Easter egg molds and set aside.
2. In the large bowl, mix the baking soda, citric acid (or cream of tartar), Epsom salt, and dried flowers (optional) with whisk and set aside.
3. Pour the oils and water into the small bowl, and mix until combined.
4. If dyeing colors, add a few drops of food coloring at a time to the oil/waterbowl until you reach the desired hue. (We wanted soft pastels for our bath bombs, so we only used about five drops of food coloring per batch.)
5. Slowly pour a small amount of the liquid into the large bowl of dry ingredients. Immediately start mixing everything together with your hands. At this point, you may notice that the liquid starts to fizz -- this is your cue to pour slower and mix faster.

6. Continue adding liquid a little at a time until it is all absorbed into the dry ingredients. The finished mixture should feel damp and clumpy in your hands, not crumbly. If this is not what your mixture feels like, you may need to add just a tad more water.

7. Generously pack each half of one of the Easter egg craft molds with the mixture. Screw both halves together and set aside.
8. Repeat Step 7 for each Easter egg mold.
9. Let the molds sit for 15 to 20 minutes. At this point, they will only be semi-dry.
10. Carefully remove one half of the mold, then turn the egg upside to remove the other side. Note: If the halves break apart, just press them back together.
11. Place each bath bomb into the empty egg carton to dry completely for 24 hours.
12. If you added dried flowers, consider wrapping the finished bath bombs with tulle to keep the petals from clogging the bathtub drain when in use (see example below).

Instructions for Use
1. Store your bath bomb in a dry place (the moment that it comes in contact with water, it will start fizzing).
2. You can use a whole bath bomb at once or cut it in half and save the other half to use later.
3. Run the bath water to a depth and temperature that are both comfortable and relaxing to you.
4. Place the bath bomb in the tub. As it dissolves, it will release all the nourishing goodies that are packed inside.
5. Step into the tub, sit back, and relax!

8 Luxurious Easter Basket Ideas
*This article was first published on the Martha Stewart Living Network on March 8, 2016.
 Hey Haute Mamas! I'm Riche Holmes Grant, a modern mom + mompreneur who designs smart + stylish products that make your mommy gig easier.
When I'm not busy taking orders from my #miniboss, I'm contributing to MarthaStewart.com or in the kitchen whipping up delicious family-friendly creations in my BambiniWare Apronini.
Get my FREE book on How to Make the Best Food for Your Baby here!
I live in the Washington, DC area with my husband and daughter. Follow our adventures on Instagram via @BambiniWareLife!
- Categories: DIY + Crafts Easter
- Riche Holmes Grant


Comments 0